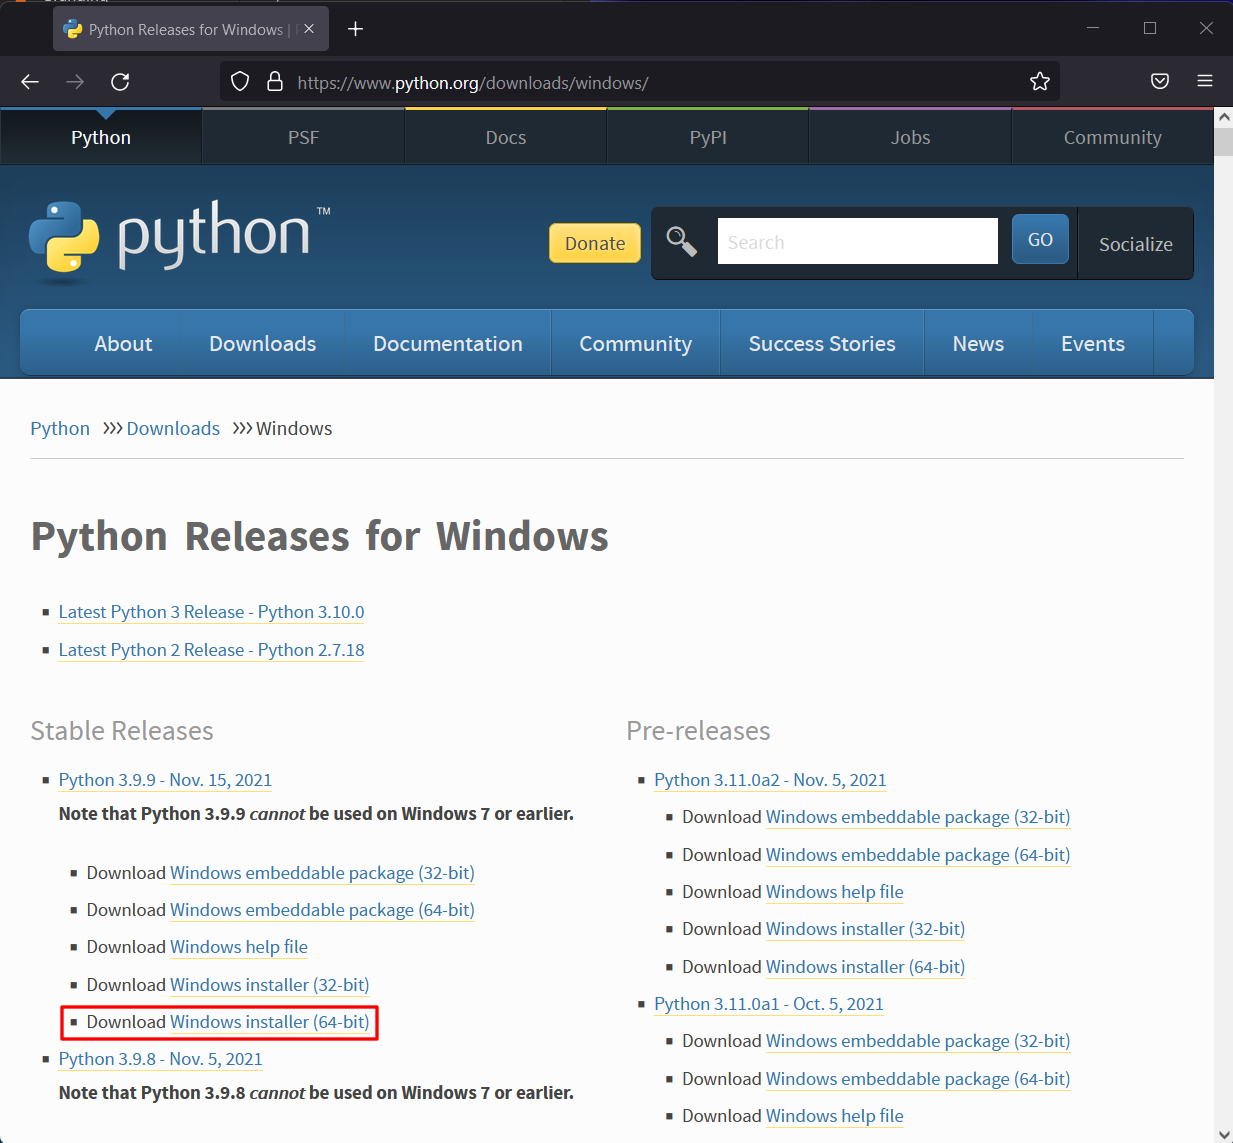
To install the latest version of Python on Windows 11, head over to the Python download website and choose Windows Installer (64-bit) under the Stable Release section:
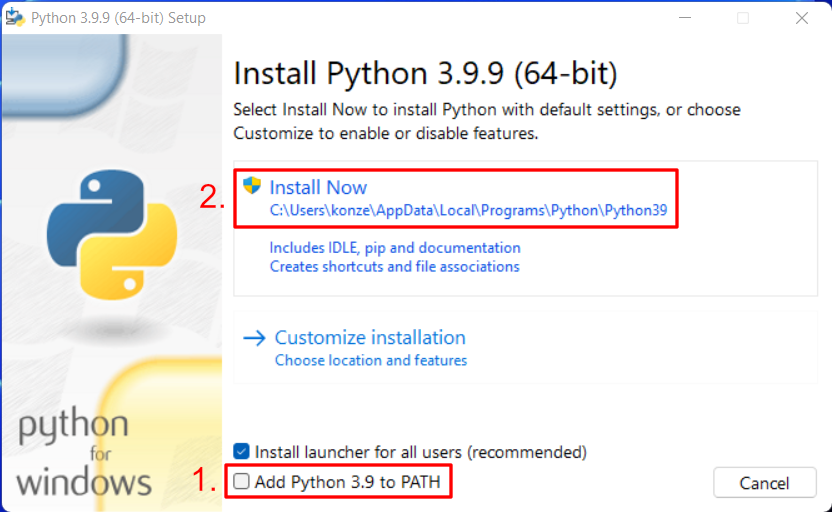
When the download has finished, open your downloads folder and double click on the installer. In the installer window, make sure to check Add Python 3.X to PATH this enables you to use the python, pip, etc. commands on the command line. Then press Install Now to install Python together with additional Python tools such as pip on your computer:
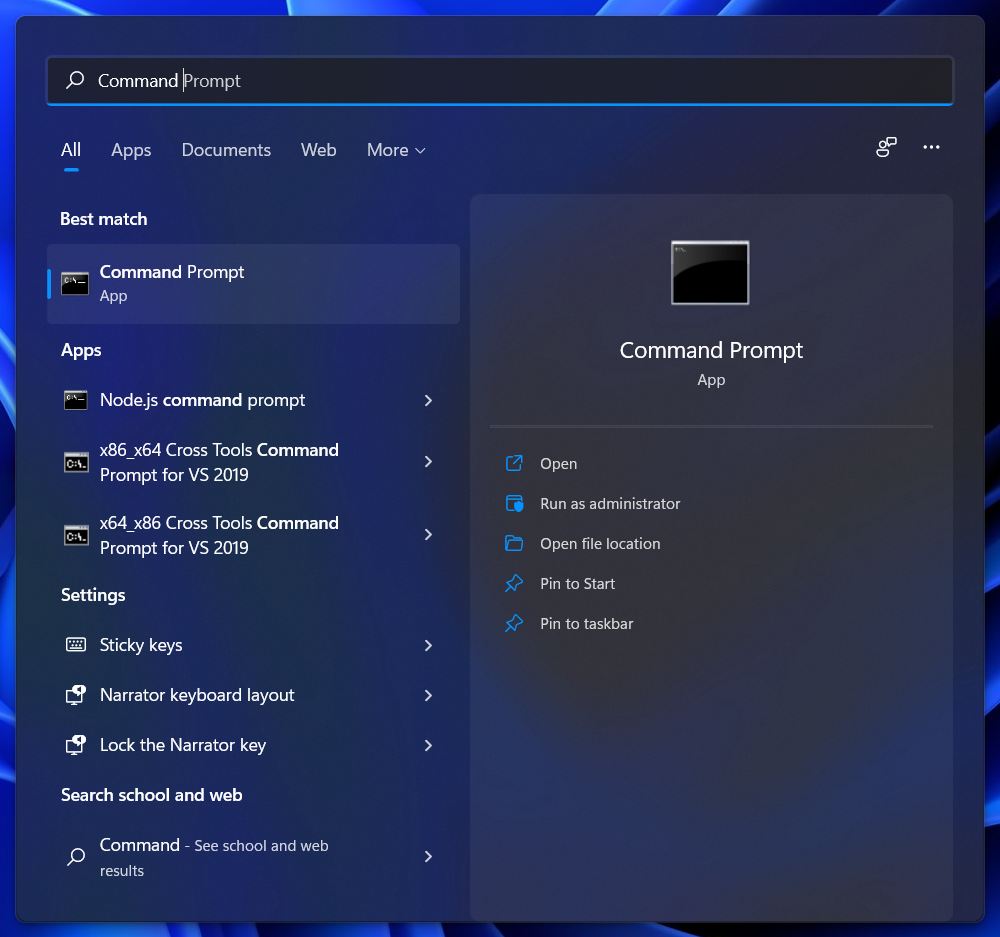
When you finish the installation successfully, you can close the Python installer. To check if your installation was successful open the Windows Command Prompt. You can search for it in the Windows 11 start menu by typing Command Prompt and press Enter to open it:
In the Command Prompt enter python --version to check if the Python version you downloaded and installed was setup successfully. If the command python --version responds with the correct version everything is working now:

If the Command Prompt responds with an error Python was probably not added to the Path environment variable. To edit the Path environment variable press Win+R to start Run and in the field Open enter: sysdm.cpl and click on OK.

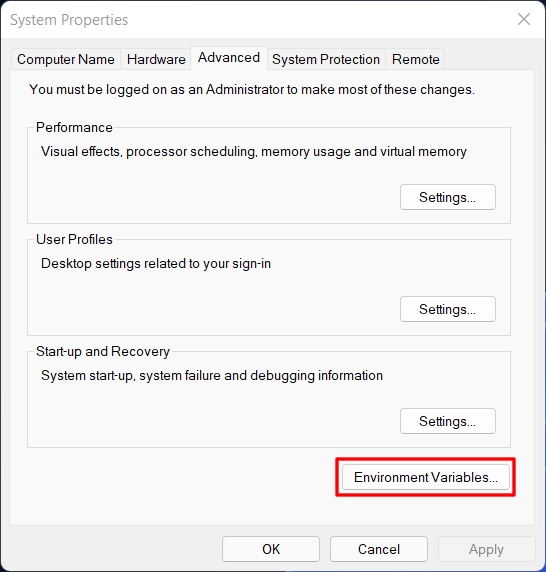
This will open the System Properties dialog. In the System Properties dialog switch to the tab Advanced and click on Environment Variables … at the bottom:
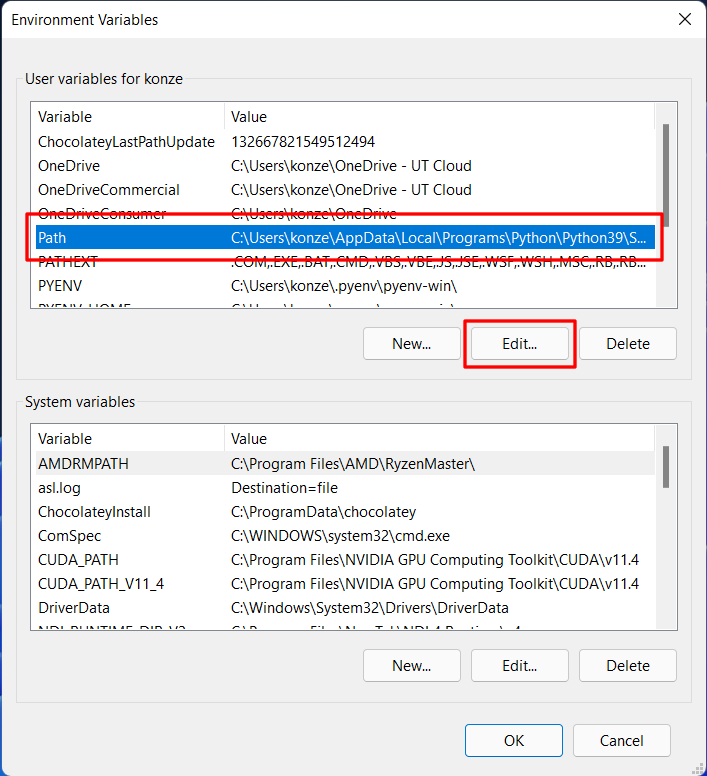
In the Environment Variables dialog choose the row Path and click on Edit …:
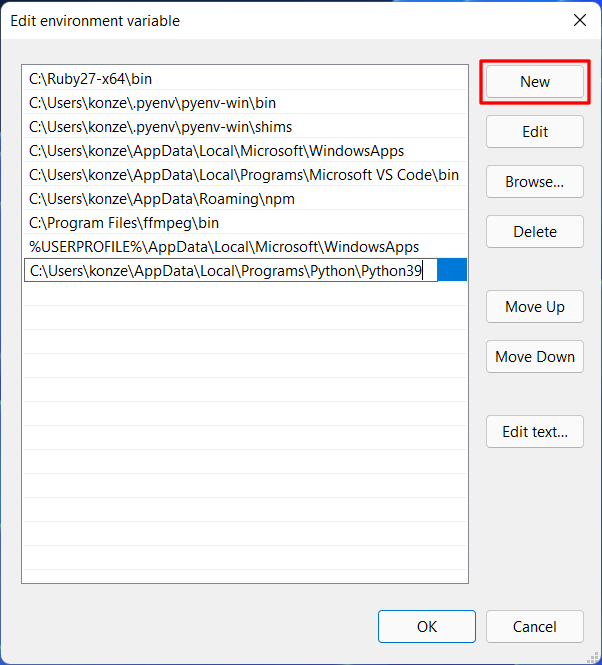
Now you can see all the paths set in the Path variable. Here you have to add two paths. First press on New and insert the following path and press Enter (YOUR_USER_NAME has to be replaced by your user name):
1
C:\Users\YOUR_USER_NAME\AppData\Local\Programs\Python\Python39\
Press New a second time and enter the following path, and press Enter (YOUR_USER_NAME has to be replaced by your user name):
1
C:\Users\YOUR_USER_NAME\AppData\Local\Programs\Python\Python39\Scripts\
Now you can click on OK in all three dialogs to close them.
Restart the Command Prompt and enter python --version once again, and you should now see the Python version you installed.
If you want to install and run multiple Python versions on Windows 11 using pyenv check out this article and video:
If you have any questions about this article, feel free to join our Discord community to ask them over there.